Vector layers are one of the coolest features in Clip Studio and they’re a godsend for doing lineart. They allow you to circumvent a lot of the annoyances with traditional raster lineart, and have a bunch of neat little options that improve your workflow. This article goes in depth into how it works and why you may want to consider using them.
Before we dive into why you may want to use vector, it’s important to talk about the differences between raster and vector layers, for those who might not know the terms.
Raster (also called bitmap) layers are the ones you’ll all be familiar with if you’ve used any drawing program like MS Paint or Photoshop before. Raster layers consist of a grid of pixels, and for every pixel it stores its color information. Every time you draw something it just updates the pixels you went over with the new color. That’s pretty much it. It’s very straightforward.
Vector layers on the other hand work by saving point and line coordinates. When you draw a line from A to B in vector, instead of saving the information for all the pixels where that line goes through, it just saves the information of where point A is, where point B is, and a formula for how the line connects between those two points. This might seem like a trivial abstraction, but it opens up a lot of possibilities for what you can do when linearting, as you’ll see shortly.
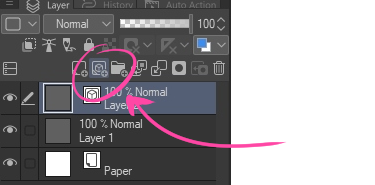
Okay, that’s out of the way, let’s create a vector layer and get into the nitty gritty stuff.
Why you want to do vector lineart:
Vector lineart is non-degradable!
Have you ever linearted something and then been like “hmm, I want to resize/rotate this”, and then you do it and the lineart becomes all blurry? That’s an inherent limitation of raster that you can’t get around. If you resize a line then it will have to stretch the pixels and in the process the line will lose its sharpness. Also, the line weight will no longer be consistent, which is a problem with this visual novel art style.
With vector, since it’s a matter of just shifting coordinates around, this problem doesn’t happen at all.
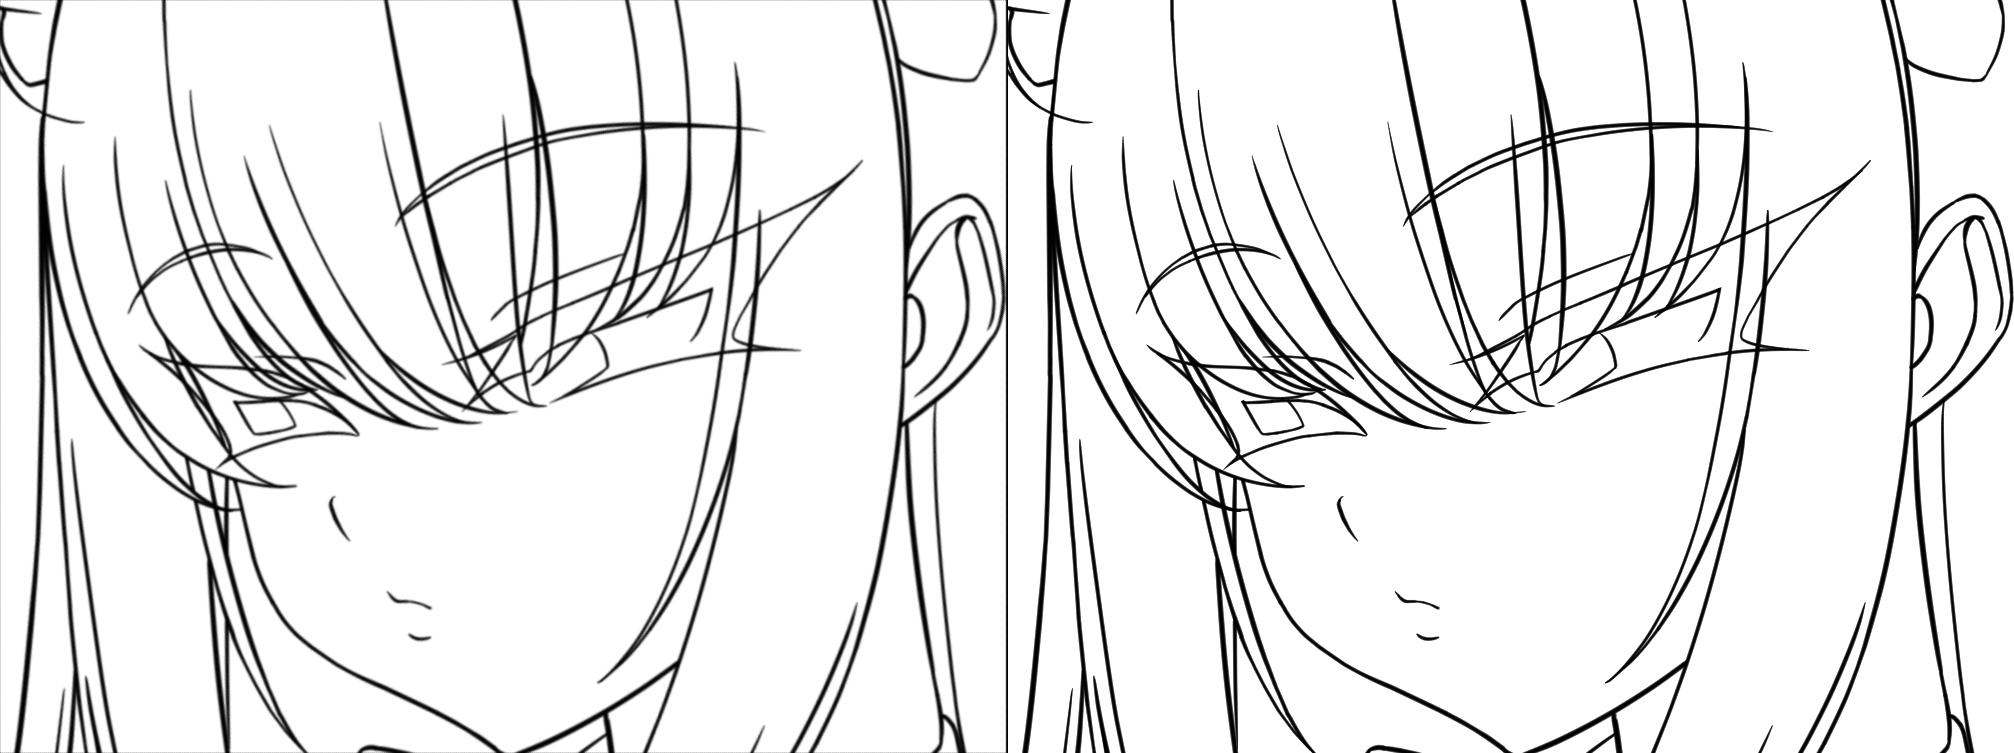
On the left is the raster version of the image that was rotated, and on the right is the vector version of the image, with the same rotation applied to it. The raster version became blurry with the resizing, but the vector is still crispy (click the image to see it in full size.) It doesn’t really matter what you do to it, the vector will always stay razor sharp, whereas the raster version will tend to only degrade further the more changes to it you make.
Vector lineart is great for line cleanup!
One of the biggest pains in the ass with doing raster lineart is dealing with line intersections. You either undershoot the connection and then have to do a careful join, or you overshoot it and then have to erase the bit of line after the intersection. If you strive to do clean lineart like I do, this is a recurring hassle.
Thankfully, with vector it’s easy to determine where intersections happen, and Clip Studio has a great option for this. If you go onto your eraser properties, there is one property called “vector eraser”. You want to select the second option here.

Now when you touch a line segment with your eraser it will automatically erase the whole segment until it finds an intersection (both ways.) Here’s a demonstration:
See how it smartly erased the line all the way until it connected with the nearest one? Pretty cool, right?
With this, you can just focus on drawing smooth lines, and then cleaning off the intersections is super quick and painless. This thing was a game changer for me.
Vector lineart is great for masking!
After you’ve done your lineart comes the tedious process of painting in the base colors – what I call masking. Everyone is familiar with this. You get your bucket tool and you drop in the color, and then you notice the color isn’t quite flush with the lineart and you get these little gaps that you have to manually fill in. These tend to be especially prominent in little corners like the tips of hair clumps. You fiddle with the options but it never quite seems to do the job as well you want it to. It’s a giant pain.
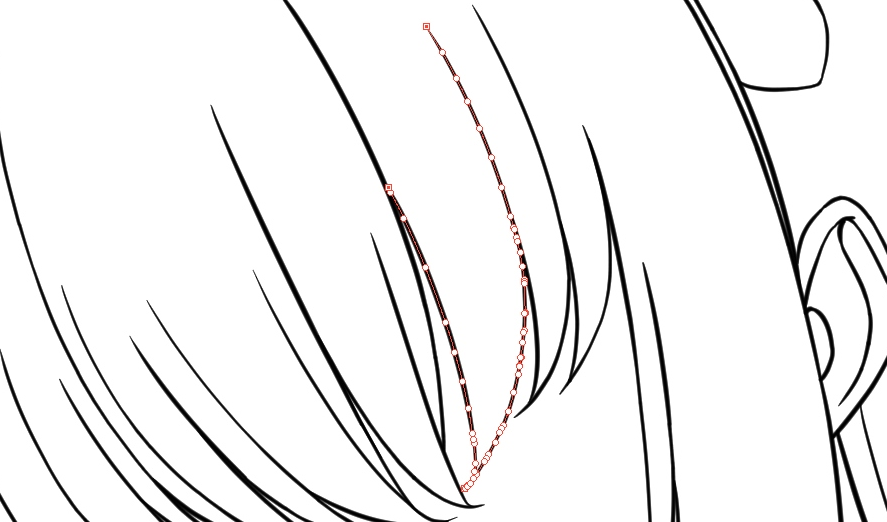
Thankfully, vector has another handy option for this. Once again, since vector is a bunch of coordinates, it’s very easy for the program to calculate where exactly the center of a line is. If you get out the control point tool and hover over a line, you can see exactly where those coordinates are.
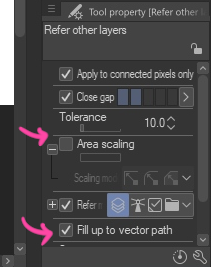
In your bucket fill tool options, disable area scaling and toggle the option that says “fill up to vector path”. These options exist in the magic wand tool as well.
Now, try using your bucket tool to do your masking and you’ll see it does a much better job at it.
See how well it filled in the corners of the hair? I didn’t even have to do any manual adjustments to it. In the long run this saves me a good chunk of time and hassle, and makes the process more enjoyable.
ps: If you look closely you will still see some gaps, but those are usually hidden entirely by the lineart and not visible. The areas that are visible, even trouble areas like the pointy hair tips, usually get covered correctly.
And that’s it! I have some more advanced tips I could talk about, but I think I’ll save that for a separate post later. If you’ve been interested in vector but didn’t know what it could do, hopefully this shone a light on the possibilities. Also, as always, be sure to check the documentation for more details on what the various tools do.